Saturday, February 14, 2009

STRIP WASH - CLAY - WAX, and PICS FROM FLORIDA BACKROADS

It was time for a general clean-up, before traveling to the Florida College Lectures last week. I addressed the paint finish first...

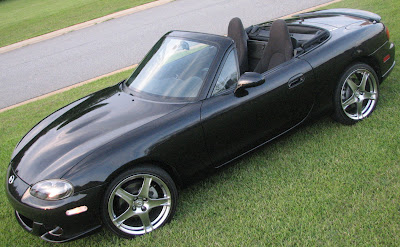
First step: strip the old wax from the finish by washing it with Dawn liquid dishwashing detergent. Second step: clay the car to remove fine, embedded dirt particles that normal washing can never ever get (never used a clay bar? see this discussion). I use "MOTHERS California Gold Clay Bar Paint Saving System." I HIGHLY recommend using a clay bar on your paint. It went much faster than it went the first time (last May?), since the first time was less than a year ago. And then third, fresh new wax:


Then I moved to the interior with my bottle of Armor All: not an overdone wet shine, but just the nice clean sheen of a new interior. The neglected area behind the seats -the windblocker and the rest of the area where the top folds down- benefitted especially. And man, the combined result of all the general clean up was sweet!

En route to Tampa, I ditched the Interstate in favor of the back roads of rural north Florida...and had the camera along for some pictures. Just north of I-10, I got off I-75 at Exit 439 for a route I had already planned out. I chose roads that missed towns for the most part, and which had curves when possible. Not that there are many curvy roads in flat, flat Florida. A few miles south of Fort White the road crosses the Santa Fe River: a beautiful little river and photo spot. Toward the southern end of my route it was pretty much impossible to avoid cities like Dunellon, Hernando, and Inverness. I rejoined I-75 at Exit 314. The backroads detour, with photography stops, added about an hour and a half to what would have been maybe an hour and forty on the interstate.


Above, and the next few photos:
At the Hwy 47 crossing of the Santa Fe River, south of Fort White


Above and below, in Bronson: These two houses were on a very short street called Main Ave., just off the main road Hathaway, and appeared to be preserved rather than currently lived in. Just thought they made a nice backdrop.

Wednesday, February 4, 2009

SHIFT LEVER: TWO ISSUES RESOLVED

Working the gears in this car has been pure pleasure compared to the other sticks I've driven, so much better than my 5-speed Camry for example. But a couple things weren't quite right.

1. When one of the guys at a Miata shop drove my car months ago, he knew by the sound that the shift boot seal was torn - that's the smaller and lower of the two boots under the decorative leather boot. As far as I know, a torn seal doesn't cause any likely problems in shifting or transmission performance since it's under a second boot, but it can certainly stand being replaced.

I've removed the console;
the upper boot lies in the passenger footwell;
the lower boot ("shift boot seal") is still in place, at the bottom of the shift lever.

2. At the bottom of the shift lever is a bushing. It's been somewhat common on Miatae for that bushing to come off and rest at the bottom of the turret in which the shift lever stands. When it comes off, the shifting feels notchy: finding the next gear doesn't have a real smooth feel. I had read about this on the Mazda-speed forum, and about a solution as well. While my Miata transmission shifts better than any stick I've owned, and while the actual shifting of the lever also feels better than any of those others, I could feel that notchiness.

The torn shift boot seal;
the white bushing that had fallen off, now back in place.

So last week I used a great how-to on the forum to guide me through removing the console etc., and upper shift boot, and confirmed that the lower boot seal was indeed torn. I ordered a new shift boot seal from Jason at Montgomery Mazda in Charlotte NC (half the price quoted by my nearest Mazda dealer). Today it arrived, and I went to Lowes and bought a 3/8" washer. Removed the shift lever, and sure enough, that bushing I mentioned above was just resting in the bottom of the turret rather than on the shift lever. Put it back in place, and removed the old shift boot seal and put the new one on. The 3/8 washer is to keep the bushing from falling off again: placing it in the bottom of the turret, under the bushing, does the job.

Put it all back together, and SWEET!! -the notchiness is gone, and the shifting is better than ever. I love this car. Cost for the boot seal, shipping, and washer: $30.73.


The car is still under warranty, but I wanted to do this myself. First, I'm sure they wouldn't put the washer in there even if I asked them to, and second I just don't want dealers touching my car if I don't know enough about them to trust them...and I haven't had occasion yet to have to get acquainted with any Mazda service guys. Well, not here anyway. The service manager in Joliet IL was great with my MX-6 some years ago...but that's a few states away.